7 Best Ways to Automate Indoor Grow Light Schedules?

Time:2026-09-17 Author:Oliver
0%

Indoor grow lights can support healthy plants when their timing matches the crop, room, and growth stage. Learning how to automate indoor grow light schedules reduces guesswork and keeps daily lighting more consistent. It also prevents the common mistake of leaving a lamp on overnight.

This guide explores seven practical methods, from basic plug-in timers to smart controllers, light sensors, and integrated environmental systems. A simple timer may suit a small herb shelf. Larger rooms may benefit from dimming controls, temperature monitoring, and backup alerts. Each method has different costs, setup demands, and failure points.

Small details matter. Place the sensor away from direct lamp glare. Keep cables dry and secured. Check the timer after power outages. Follow the light manufacturer’s instructions and verify the plant’s recommended photoperiod through reliable horticultural sources. Legal, indoor gardening applications should remain the focus.

No schedule is perfect.

Plants can respond differently, even under identical settings. A leafy herb may tolerate a longer light period, while a flowering plant may need a carefully controlled dark cycle. Excess light can create heat, pale leaves, or dry growing media. Insufficient light may produce stretched stems and weak growth.

The best system is not always the most expensive one. It should be stable, observable, and easy to adjust. These seven approaches provide a practical starting point, although real results may require patient testing. Record daily observations, including leaf position, room temperature, and soil moisture. That record can reveal problems that automation alone cannot solve.
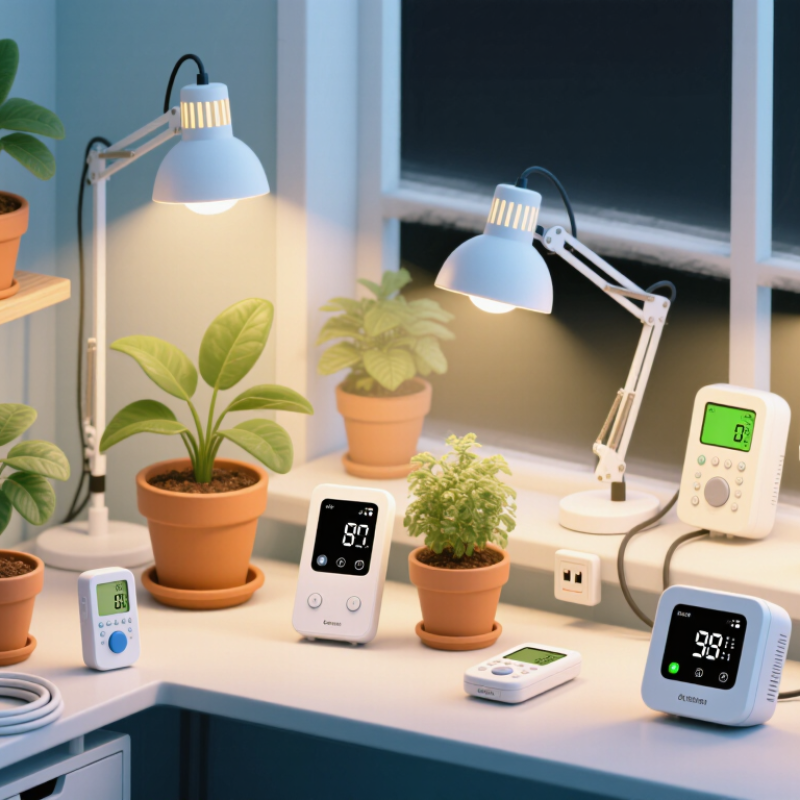
7 Best Ways to Automate Indoor Grow Light Schedules?

Choose the Right Grow Light Timer for Your Indoor Garden

Choosing the right grow light timer can make indoor gardening more consistent and less tiring. I have found that a simple digital timer suits most small gardens. It offers daily, weekly, and multiple on-off settings. Mechanical timers can work too, but their small pins may shift after repeated use. Smart timers add remote control, yet they depend on stable Wi-Fi and careful setup.

Match the timer to your light’s electrical load. Check its voltage, wattage, and grounding requirements before plugging anything in. A timer with a battery backup can preserve the schedule during short power cuts. For seven practical automation options, consider a mechanical timer, digital timer, programmable outlet, sunrise simulation, dimming controller, smart outlet, or centralized lighting controller. Choose based on reliability, not the longest feature list. Keep it simple.

Set the light cycle around the plant’s growth stage and natural resting period. Many leafy seedlings perform well with roughly 14 to 16 hours of light, but species differ. A timer should start and stop at the same time each day, such as 7:00 a.m. and 9:00 p.m. Watch for stretched stems, pale leaves, or dry potting mix. These signs may indicate an unsuitable schedule, excessive intensity, or poor ventilation. Test it. Observe for one week, record changes, and adjust gradually. My own setups have needed corrections after daylight entered through a nearby window. A timer cannot fix every lighting mistake.

7 Best Ways to Automate Indoor Grow Light Schedules

Recommended daily light periods for common indoor garden categories. Use these values as a starting point and adjust them according to plant response, growth stage, and light intensity.

Scheduling tip: A programmable timer can maintain consistent on/off cycles, reduce energy waste, and provide the uninterrupted dark period many plants need for healthy growth.

Set Daily Light and Darkness Periods for Each Plant Type

7 Best Ways to Automate Indoor Grow Light Schedules

Set Daily Light and Darkness Periods for Each Plant Type

Automating indoor grow lights starts with matching daily light hours to each plant type. Leafy greens often perform well with 12 to 16 hours of light. Many herbs prefer about 12 to 14 hours. Flowering plants may need shorter days and longer, uninterrupted nights. Check reliable horticultural references for each species before programming a schedule.

A programmable timer offers simple control. A smart outlet adds remote adjustments and calendar settings. A grow-light controller can manage dimming, sunrise ramps, and gradual evening fades. Light sensors help correct seasonal changes, although they need careful placement. I once gave young seedlings too much light and noticed pale, stressed leaves. My schedule looked efficient, but the plants disagreed. Now I change only one setting at a time.

Tips: Keep darkness completely dark for plants that need photoperiod control. Set lights to start at the same time daily. Use a backup timer after power interruptions. Record light hours, plant growth, leaf color, and watering needs each week. A small log often reveals patterns that memory misses. Leave space between fixtures and foliage, because heat can build quietly. Test the schedule for several days before making another adjustment.

7 Best Ways to Automate Indoor Grow Light Schedules? - Set Daily Light and Darkness Periods for Each Plant Type

Recommended photoperiods, darkness periods, light intensity targets, and practical automation methods for common indoor plants

Plant Type Growth Stage Light Period per Day Darkness Period per Day Approx. PPFD Target Approx. DLI Target Best Automation Method Scheduling Guidance
Leaf Lettuce Vegetative growth 14–16 hours 8–10 hours 150–250 µmol/m²/s 10–17 mol/m²/day 1. Programmable daily timer Use a consistent start and stop time each day. A longer photoperiod with moderate intensity helps provide sufficient light without excessive heat.
Basil and Culinary Herbs Active vegetative growth 14–16 hours 8–10 hours 200–400 µmol/m²/s 12–23 mol/m²/day 2. Sunrise and sunset ramping Gradually increase and decrease light over 15–30 minutes to reduce sudden changes and support a stable daily rhythm.
Microgreens Post-germination growth 12–16 hours 8–12 hours 100–250 µmol/m²/s 4–14 mol/m²/day 3. Repeating weekly schedule Keep the same schedule throughout the short crop cycle. Avoid continuous lighting because a daily dark period supports normal plant respiration.
Tomato Seedling 14–16 hours 8–10 hours 100–200 µmol/m²/s 5–12 mol/m²/day 4. Light sensor with dimming control Use a sensor or meter to maintain a stable intensity when possible. Reduce intensity or increase fixture distance if seedlings become tall, pale, or stressed.
Tomato Vegetative growth 16–18 hours 6–8 hours 300–500 µmol/m²/s 18–32 mol/m²/day 5. Temperature-linked automation Connect light dimming or shutdown rules to temperature monitoring. Shorten or dim the light period if the growing area becomes too warm.
Tomato Flowering and fruiting 12–16 hours 8–12 hours 400–700 µmol/m²/s 17–40 mol/m²/day 6. Multi-zone scheduling Place plants with similar light needs in the same zone. Use separate schedules for seedlings, mature plants, and plants entering a flowering cycle.
Sweet Pepper Vegetative growth 14–16 hours 8–10 hours 250–500 µmol/m²/s 13–29 mol/m²/day 7. Calendar-based seasonal adjustment Review the schedule every few weeks as outdoor daylight and indoor temperatures change. Adjust intensity before changing the photoperiod.
Strawberry Vegetative growth and fruit development 14–16 hours 8–10 hours 200–400 µmol/m²/s 10–23 mol/m²/day Programmable timer with alert backup Set an alert for missed schedules or power interruptions. A reliable daily cycle is more useful than frequent manual changes.
Orchid Mature plant 12–14 hours 10–12 hours 100–250 µmol/m²/s 4–13 mol/m²/day Low-intensity timer schedule Provide bright but indirect-quality light. Keep the fixture schedule stable and avoid placing the plant close enough to experience leaf heat or bleaching.
Low-Light Tropical Houseplants Maintenance growth 10–12 hours 12–14 hours 50–150 µmol/m²/s 2–6 mol/m²/day Fixed daily timer Use a moderate schedule with a full dark period. Increase light gradually if leaves become small, growth becomes stretched, or leaf color fades.

Important: PPFD and DLI values are practical target ranges rather than universal requirements. Actual needs vary with cultivar, fixture height, canopy density, temperature, humidity, and plant health. Use a light meter when available and keep a consistent daily dark period.

Create Gradual Sunrise and Sunset Transitions

Create Gradual Sunrise and Sunset Transitions

Automated grow lights should imitate daylight, not switch on like a ceiling lamp. A dimmable controller can raise brightness gradually over 20 to 45 minutes. This creates a softer morning for plants and reduces sudden environmental changes. Set the final intensity according to plant needs, growth stage, and fixture height. A light meter helps, but careful observation matters too.

Use one schedule for sunrise and another for sunset. For example, begin at 6:00 a.m., reach full brightness by 6:30, and start dimming at 6:00 p.m. A longer evening fade can prevent abrupt darkness in indoor rooms. Some plants may respond better to shorter transitions. My first schedule was too aggressive, and leaf edges curled slightly. I adjusted it slowly instead of changing everything at once.

Tips: Keep daily light duration consistent. Check leaf posture, color, and soil moisture each week. Use a backup timer if the controller loses power. Avoid placing the sensor where shadows distort readings. Record small changes in a simple log. This makes problems easier to trace. A sunrise ramp is helpful, but it cannot correct excessive heat, poor ventilation, or unsuitable watering. Review the schedule every few weeks, because plant size and seasonal room temperatures can change the best setting.

Adjust Light Schedules During Different Growth Stages

Automating indoor grow lights works best when schedules follow plant development, not a fixed clock.

Begin with a baseline: record photoperiod, PPFD, room temperature, and daily light integral (DLI). ASABE EP610.1-2021 recommends measuring horticultural lighting with calibrated sensors, not relying on fixture settings alone. During propagation, use gentle light and a longer day. After roots establish, increase intensity gradually. During vegetative growth, extend the light window only if plants remain compact and leaf color stays healthy.

Use seven practical controls: stage-based presets, sunrise and sunset dimming, weekly sensor checks, temperature-linked dimming, blackout verification, seasonal adjustments, and automatic alarms.

A ten-minute ramp can reduce sudden stress, although it is not always necessary for every crop. Cornell Controlled Environment Agriculture guidance commonly places leafy greens near 12–17 mol·m⁻²·day⁻¹ DLI, so the target should be measured at canopy height.

More light is not automatically better.

My early schedules often pushed intensity too quickly, creating curled leaves and unnecessary heat.

During flowering or fruit production, change one variable at a time.

Increase DLI gradually, then observe growth for several days before extending the photoperiod. The U.S. Department of Energy’s 2023 Solid-State Lighting R&D Opportunities report emphasizes photon efficacy, but efficient fixtures still waste energy when lights run during heat buildup. A temperature sensor can reduce output during hot afternoons. Keep a paper log too. Automation fails occasionally, and a missed dimming event may only become visible after several days.

Monitor Plant Responses and Fine-Tune Automated Settings

Automated grow-light schedules work best when plants, not the clock, guide adjustments. Set a consistent photoperiod, then inspect leaves, stems, and soil moisture several times each week. Upright leaves and steady new growth often suggest suitable lighting. Pale leaves, stretched stems, or curled edges may signal poor intensity, heat, or an unsuitable schedule.

Use a light sensor to check intensity at canopy level, where plants actually receive light. Record readings, temperature, watering dates, and visible changes in a simple log. Small changes are safer than dramatic corrections. Increase or reduce daily light exposure by 15 minutes, then observe the plants for several days.

Keep night periods dark and predictable.

Plants need rest, too.

Automation should respond to evidence. A timer can adjust lighting after sunrise, while a controller can reduce intensity when the growing area becomes too warm. However, sensors can drift, and one reading may mislead you.

I once changed a schedule too quickly after noticing leaf curl, but heat from nearby equipment was the real problem. Check the whole environment before editing settings.

Review the log weekly, compare new growth, and refine one variable at a time. Imperfect records still reveal patterns.

FAQS

What type of timer suits a small indoor garden?

A simple digital timer usually works well for small setups. It can offer daily, weekly, and multiple on-off settings. Keep it simple.

Are mechanical timers still useful?

Yes, mechanical timers can control lights without complicated setup. However, their small pins may shift after repeated use. Check the schedule regularly.

What should I check before connecting a timer?

Check the light’s voltage, wattage, and grounding requirements. The timer must safely handle the electrical load. Do not guess.

Can a timer keep its schedule during a power cut?

A battery-backup timer may preserve settings during short outages. This helps keep morning and evening cycles consistent. It is not perfect.

How many lighting hours do seedlings need?

Many leafy seedlings perform well with about 14 to 16 hours of light. Plant species can differ, so observe their growth carefully. Plants need darkness, too.

What schedule could I try?

You could set the lights from 7:00 a.m. to 9:00 p.m. each day. Keep the start and stop times steady. Nearby daylight may still alter the result.

How can I tell whether the lighting schedule is unsuitable?

Stretched stems, pale leaves, curled edges, or dry potting mix may signal trouble. Heat, weak ventilation, and excessive intensity can cause similar symptoms. Check the whole area.

How should I adjust an automated lighting schedule?

Change only one setting at a time. Adjust daily exposure by 15 minutes, then observe the plants for several days. Small changes are safer. My records are sometimes incomplete, but patterns still appear.

Should I use a light sensor?

A light sensor can measure intensity at canopy level, where leaves receive the light. Record readings, temperature, watering dates, and visible changes. One reading may mislead you.

How often should I review the plants and timer?

Inspect leaves, stems, and soil several times each week. Review your notes weekly and compare new growth. Correct slowly, not dramatically.

Conclusion

Learning how to automate indoor grow light schedules begins with selecting a reliable timer that supports consistent daily operation and flexible programming. Set separate periods of light and darkness according to each plant’s needs, since seedlings, leafy plants, and flowering crops may respond best to different schedules. A programmable system can also create gradual sunrise and sunset transitions, helping plants adjust more naturally than sudden on-and-off changes.

As plants develop, update the automated schedule to match each growth stage. Young plants may need a different balance of light and darkness than mature plants, so avoid using one setting throughout the entire growing cycle. Regularly observe leaf color, growth rate, stretching, and signs of stress. These responses can help you fine-tune light duration, intensity, and transition timing. By combining an appropriate timer, stage-based scheduling, gentle transitions, and ongoing observation, you can develop an efficient approach to how to automate indoor grow light schedules while supporting healthy, consistent plant growth.

Oliver

Oliver

Oliver is a seasoned marketing professional with a wealth of expertise in driving brand awareness and engagement. With a deep understanding of our company's product offerings, he consistently delivers high-quality content that enriches our professional blog. His insights not only shed light on......