Flickering can turn a productive grow room into a frustrating diagnostic scene. Leaves may appear healthy, yet the light pulses, fans hum, and drivers feel unusually warm. For growers searching “how to fix flickering led grow light bars,” the real solution begins with evidence, not guesswork. Loose connectors, unstable dimmers, overloaded power supplies, poor grounding, and damaged LED drivers can produce similar symptoms. They require different repairs.
This guide introduces China’s top 10 LED grow light bar manufacturers and examines practical flicker-prevention features. The evaluation considers driver quality, thermal design, dimming compatibility, warranty support, testing documentation, and field feedback. The U.S. Department of Energy’s Solid-State Lighting research identifies drivers and thermal management as important factors in LED reliability. The DesignLights Consortium also highlights electrical safety, photosynthetic performance, and product verification for horticultural lighting. IEEE 1789 offers guidance for reducing health risks linked to temporal light modulation, although it does not replace product-specific testing. NEMA LSD 63 further supports careful evaluation of LED flicker and measurement conditions.
A ranking is not proof of perfect performance. Real installations behave differently. A dusty connector, a long extension cable, or a mismatched controller can change the result. I have also found that some product pages provide impressive efficiency figures but limited flicker data. That gap deserves attention. Each recommendation should therefore be checked against measured output, installation conditions, and the manufacturer’s technical documents. The aim is simple: safer troubleshooting, steadier plant lighting, and fewer expensive replacements.
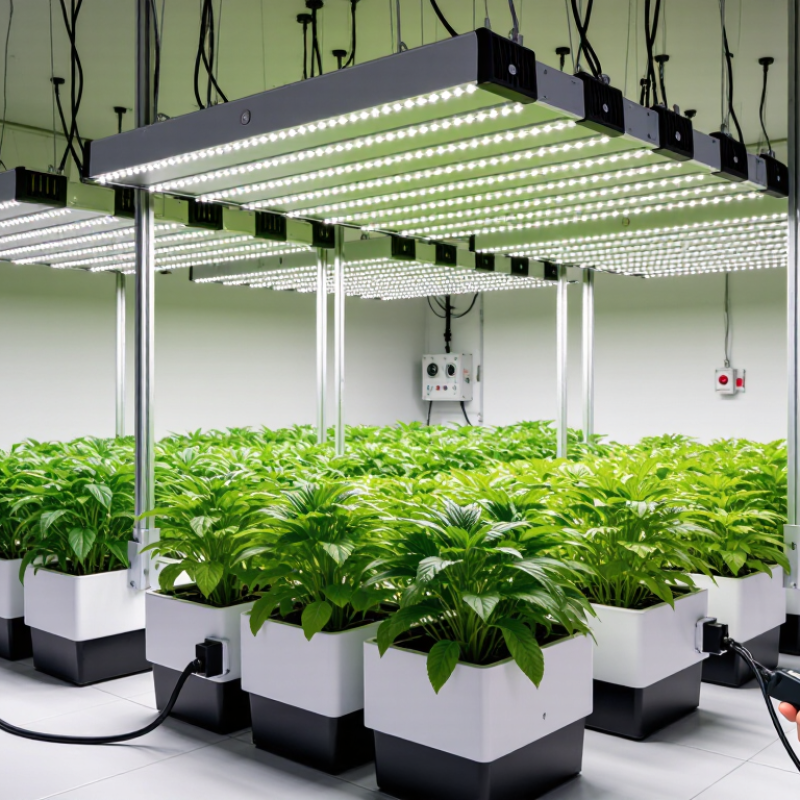
Identify the cause before replacing parts. Flicker usually begins with unstable power, a weak driver, loose wiring, or incompatible dimming equipment. Inspect the bar while it is operating. Look for pulsing shadows on moving leaves, buzzing sounds, or brightness changes after warming. A phone camera can reveal rolling bands, but it cannot measure flicker reliably. Use a flicker meter when possible.
The U.S. Department of Energy’s solid-state lighting reports identify driver electronics as a major source of temporal light modulation. IEEE 1789-2015 also explains that flicker risk depends on modulation depth and frequency, not brightness alone. Disconnect the dimmer and test the light at full power. If flicker stops, check dimmer compatibility and control wiring. If it continues, measure the input voltage and inspect terminal connections. A damaged driver may flicker after ten minutes of heat buildup. That detail is easy to miss. Grow-room humidity can also accelerate corrosion, although blaming humidity too quickly is a common mistake.
Tips: Record when flicker appears, then test one variable at a time. Tighten power terminals only after isolation from electricity. Compare readings at startup and after thirty minutes. Replace a driver only with matching voltage, current, and thermal ratings. Do not rely on visual comfort alone; plants may show uneven growth before people notice the flicker. The DesignLights Consortium’s technical guidance also supports checking dimming behavior and control compatibility during fixture evaluation.
Flickering LED grow light bars often begin with unstable power, not failed LEDs. Check the wall outlet, timer, dimmer, and extension cord before replacing the fixture. Use a true-RMS multimeter to measure voltage while the bars are operating. A loose terminal may show normal voltage at rest, then sag when the load starts. Inspect each connector for heat marks, discoloration, or a faint burnt-plastic smell.
The driver deserves close attention. IEEE 1789-2015 evaluates light modulation through frequency and modulation depth, because visible flicker can increase when output ripple becomes excessive. CIE TN 006:2016 also recommends checking PstLM and SVM, two recognized flicker assessment metrics. A flicker meter is more useful than a phone camera, although the camera can reveal rolling dark bands during a quick inspection. Some regions use limits near PstLM 1.0 and SVM 0.9 for general lighting, but grow-light installations still require application-specific judgment.
Keep high-current lighting circuits separate from motors, pumps, and heating equipment when possible. Confirm that the power supply rating exceeds the total bar load, including startup demand. Tighten terminals only after disconnecting power, and never bypass protective grounding. I have seen a clean connector hide a weak crimp. That detail matters. If flicker changes when another device starts, electrical stability is the stronger suspect. If the supply remains stable but ripple persists, record the driver model, output voltage, and temperature, then seek qualified technical testing.
| No. | Likely Cause | What to Check | Recommended Fix | Useful Measurement or Target | Priority | Safety Note |
|---|---|---|---|---|---|---|
| 1 | Unstable or overloaded power supply | Check whether the total lamp wattage exceeds the power supply, circuit, or timer rating. | Use a correctly rated power supply or divide the lighting load across suitable circuits. Avoid operating a supply continuously at its maximum rating. | Supply output should remain within the LED driver's specified voltage range during operation; voltage should not repeatedly drop or recover. | High | Disconnect power before changing wiring. Use a qualified electrician for circuit modifications. |
| 2 | Loose plug, terminal, or connector | Inspect plugs, socket outlets, terminal blocks, quick connectors, and waterproof connectors for looseness, discoloration, or heat damage. | Switch off power, reseat the connection, tighten approved terminals, and replace damaged or overheated connectors. | A secure connection should not move under light manual pressure and should not produce crackling, arcing, or abnormal heat. | High | Never inspect exposed live conductors. Replace, rather than tape, damaged electrical connectors. |
| 3 | Incompatible dimmer or lighting controller | Determine whether the flicker begins when a dimmer, timer, smart switch, or external controller is connected. | Temporarily bypass the controller for testing. Use a controller and LED driver with compatible dimming protocols and load ratings. | The driver and controller must support the same control method, such as 0–10 V, PWM, or mains-phase dimming. | High | Do not connect a low-voltage control lead directly to a mains-voltage terminal. |
| 4 | Voltage drop in long or undersized cables | Measure voltage at the power supply and at the light bar while the system is operating, especially at the farthest fixture. | Shorten cable runs where possible, use an appropriately larger conductor, or distribute power closer to the fixtures. | The voltage at the light should stay within the LED driver's stated input range under load, not only when disconnected. | High | Cable size and installation method must comply with local electrical regulations and the circuit's current rating. |
| 5 | AC line disturbances or shared high-load equipment | Check whether flicker coincides with pumps, fans, heaters, compressors, or other high-current equipment switching on. | Test the grow lights on a dedicated circuit or separate power source. Improve circuit distribution and remove unnecessary shared loads. | Compare the light's behavior when nearby loads start and stop. Persistent supply fluctuations require professional power-quality testing. | High | Do not bypass circuit protection or increase a breaker rating without verifying the wiring capacity. |
| 6 | Failing LED driver or power adapter | Look for intermittent output, excessive heat, buzzing, swelling, corrosion, or a flicker that continues with stable input power. | Replace the driver with one having the correct input, output, current, wattage, polarity, and environmental ratings. | A multimeter reading should be compared with the driver's nameplate specifications; unstable output under load indicates a possible driver fault. | High | Use only a replacement driver with compatible electrical specifications. Do not open a sealed mains driver. |
| 7 | Overheating caused by poor ventilation | Check whether flicker appears after warm-up and whether the driver or light bar is unusually hot. | Improve airflow, keep vents clear, reduce heat buildup, and mount the driver according to its thermal requirements. | Compare operating temperature with the equipment's specified limit. A thermal camera or contact thermometer can help identify hot spots. | Medium | Turn the system off before touching the fixture. Keep combustible materials away from hot components. |
| 8 | Moisture, corrosion, or condensation | Inspect connectors, cable entries, end caps, and the growing-area environment for water droplets, oxidation, or salt deposits. | Dry and isolate the equipment, replace corroded parts, improve sealing, and use fixtures with an appropriate ingress-protection rating. | There should be no visible moisture inside the fixture or connector. The required IP rating depends on the installation exposure. | High | Do not energize wet equipment. Have insulation and leakage concerns assessed by a qualified professional. |
| 9 | Grounding, neutral, or polarity problem | Check grounding continuity, neutral connections, polarity, and signs of nuisance tripping or electrical noise. | Correct wiring defects and verify protective grounding in accordance with local codes. Do not rely on a ground wire as a current-carrying conductor. | Use an approved tester to verify polarity and grounding; a simple visual inspection is not sufficient. | High | Only qualified personnel should test or alter mains wiring. Stop use if there is tingling, sparking, or repeated breaker tripping. |
| 10 | Normal low-frequency modulation or defective LED modules | Record whether flicker is visible only on camera, under dimming, or continuously. Compare with a known-good light bar using the same supply. | Set the controller to full output for testing, replace defective LED modules, or select a driver with low-flicker performance suitable for plant lighting. | Phone-camera banding is a warning sign, not a precise measurement. A flicker meter or oscilloscope is needed for reliable modulation analysis. | Medium | Do not remove diffusers or touch LED boards while energized. Follow the fixture's service instructions. |
China Top 10: How to Fix Flickering LED Grow Light Bars?
Flickering usually begins with a loose connection, an aging driver, or unstable control timing. Turn off power before touching the fixture. Inspect each LED bar for dark sections, cracked solder joints, swollen components, or heat discoloration. A warm connector deserves attention. Do not trust a phone camera alone; rolling bands can reveal flicker, but they cannot measure modulation accurately.
The driver is often the real suspect. Check its output rating, wiring, ventilation, and compatibility with the dimming method. The U.S. Department of Energy’s Solid-State Lighting R&D Opportunities report identifies driver electronics and controls as important areas for improving LED performance and reliability. IEEE 1789 guidance also links visible flicker risk to modulation depth and frequency, so a driver can appear bright while still producing problematic fluctuations.
Timers and control components deserve equal scrutiny. Mechanical timers may create brief power interruptions, while low-quality dimmers can conflict with constant-current drivers. Bypass the timer temporarily, then test the light at full output. Add components one at a time. This isolates the fault. The DesignLights Consortium’s horticultural lighting requirements emphasize documented performance and control compatibility, not appearance alone. That matters in real installations. I have seen a clean-looking system flicker because one inexpensive connector was slightly loose. My first diagnosis was wrong. Rechecking every connection is slower, but usually more reliable.
This normalized waveform illustrates why a flickering LED grow light bar should be checked at the LED bar, driver, timer, and control connections. A poorly filtered driver can produce light-output modulation at twice the 50 Hz mains frequency, while a properly regulated driver keeps output nearly constant. Inspect loose terminals, damaged LED bars, unstable driver voltage, timer contacts, and dimming or control signals before replacing components.
Flickering LED grow light bars often indicate a loose connection, failing driver, or unstable power supply. Unplug the light and let it cool before touching any parts. Check the power cord, plug, timer, and connector ends for heat marks or cracked insulation. Stop there. Do not open a powered fixture. A damaged cord needs replacement, not temporary tape.
Inspect the LED bar for moisture, burnt spots, or darkened diodes. Gently tighten accessible low-voltage connectors, but never force them. A multimeter can test voltage stability, although only trained users should measure live circuits. If the output jumps sharply, replace the driver with a matching voltage and current rating. Do not guess. An incorrect driver can overheat the bar or create an electric shock risk.
Faulty LED strips, sockets, and connectors should be replaced with parts designed for the fixture’s heat and electrical load. Keep ventilation paths clear, especially above reflective panels where dust collects. I have seen growers replace the light bar while ignoring a loose timer, so the flicker returned the next day. That mistake is easy to make. Test the repaired unit for several hours away from water, paper, and other flammable materials. If flickering continues, ask a qualified electrical technician to inspect the circuit.
Flickering LED grow light bars usually indicate a system problem, not failed diodes alone. Unplug the fixture, then inspect every connector for looseness, discoloration, or moisture. Check the power supply output with a suitable multimeter and compare it with the fixture’s rated voltage. A fluctuating reading suggests a failing driver, overloaded circuit, or unstable connection. Test one light bar at a time. This isolates the fault quickly.
Tips: Record when flickering occurs. Does it happen after dimming, watering, or several hours of heat? Remove the dimmer temporarily and test the light at full output. Check ventilation around the driver, because trapped heat can trigger repeated shutdowns. Never bypass protective components. If electrical readings seem unsafe, ask a qualified technician for help.
Prevention depends on routine checks. Keep cables away from standing water and avoid sharp bends near connectors. Clean dust from ventilation openings every few weeks. Use a timer and power circuit that match the system’s electrical load. Flickering can also come from poor household wiring, so test another suitable outlet for comparison. It is easy to blame the LED bars too soon. In practice, the driver or connector often deserves attention first. I would also document temperature and voltage readings, although that step is easy to skip during a busy growing cycle.
Common causes include loose connectors, aging drivers, unstable power, and faulty timers. Start with the simplest possibility. A slightly loose plug can make the entire fixture flicker.
Switch off the power, unplug the fixture, and let it cool completely. Never open or handle a powered fixture. Keep water, paper, and other flammable materials away during testing.
Look for dark sections, burnt spots, moisture, cracked solder joints, or heat discoloration. Check whether any connector feels unusually warm. Do not force tight connectors. A damaged cable needs replacement.
Check the driver’s voltage, current rating, wiring, and ventilation. Its ratings must match the LED bars. A multimeter can check voltage stability, but live testing requires proper training. Do not guess.
Yes. Mechanical timers can create brief interruptions. Some dimmers conflict with constant-current drivers. Temporarily bypass the timer, then test the light at full output. Add control components one at a time.
A phone camera may show rolling bands across the light. However, it cannot accurately measure modulation or flicker risk. Use it only as a warning sign. It is not a proper test instrument.
Replace cracked cords, damaged connectors, faulty sockets, and visibly burned LED bars. Replace the driver with a matching voltage and current rating. Temporary tape is not a safe cable repair. Choose parts designed for the fixture’s heat and electrical load.
Recheck the timer, connectors, driver, and power supply. I once blamed the light bar first. The real problem was a loose timer connection. That diagnosis was wrong. Test the repaired fixture for several hours, and contact a qualified technician if flickering continues.
Flickering LED grow light bars can reduce lighting consistency and may indicate problems with the power supply, wiring, or internal components. This guide explains how to fix flickering led grow light bars by first identifying the source of the issue. Check whether the outlet provides stable power, examine plugs and connections for looseness or damage, and confirm that extension cords and timers are suitable for the system. Electrical instability, overheating, or poor contact can all cause intermittent flickering.
The guide also covers inspecting LED bars, drivers, dimmers, timers, and control devices for signs of failure. Safe repairs may include tightening connections, improving ventilation, replacing damaged cables, or installing compatible replacement parts. After servicing the system, test the lights under normal operating conditions and monitor them for recurring problems. Regular cleaning, secure wiring, proper airflow, and periodic inspections can help prevent future flickering and maintain reliable plant lighting.
