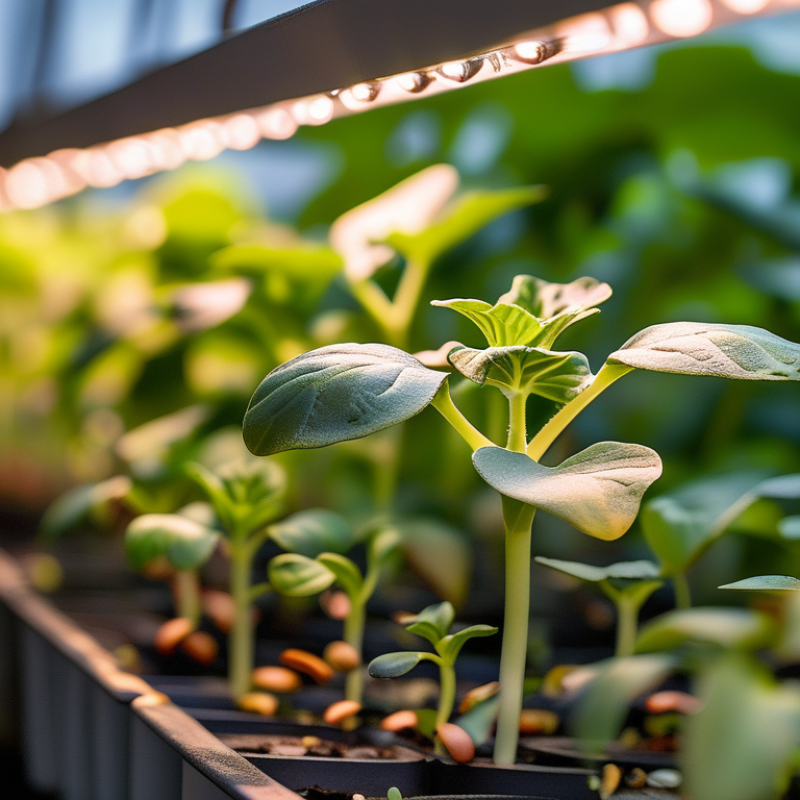
Learning how to use dimmable grow lights for different growth stages can improve plant health, energy efficiency, and harvest consistency. Light intensity should change as seedlings mature, rather than staying at one setting throughout the cycle. Young seedlings usually need gentle light, while established plants can tolerate stronger output. Too much intensity may cause pale leaves, curling, or slowed growth.
This guide explains practical dimming methods for seedlings, vegetative plants, flowering crops, and finishing stages. It considers light intensity, daily exposure, hanging height, and plant response. A dimmer percentage alone does not tell the whole story. PPFD measurements provide better guidance, especially when paired with the manufacturer’s recommended coverage area. A simple light meter can also help, although inexpensive meters may not measure horticultural light accurately.
Watch the leaves closely. That matters more than a fixed schedule. Healthy seedlings often show compact growth without bleached tips. Vegetative plants should develop sturdy stems and evenly spaced leaves. During flowering, stronger light may support development, but heat stress can quickly reduce quality. Keep the canopy temperature stable and maintain suitable airflow.
Real growing rooms are rarely perfect. Plants differ by cultivar, container size, nutrition, and climate. I have found that gradual adjustments work better than sudden changes. Still, every recommendation should be tested against actual plant behavior. Record the dimmer setting, hanging distance, temperature, and weekly growth. These notes reveal patterns that memory often misses and help you refine a safer, more reliable lighting routine.
How to Use Dimmable Grow Lights for Each Growth Stage
Understanding light needs at each plant growth stage prevents weak stems, bleached leaves, and wasted electricity. Cornell University’s Controlled Environment Agriculture guidance commonly places seedlings near 100–250 PPFD. Keep the light gentle for 16–18 hours daily. Raise intensity slowly as roots develop. A 2023 HortScience review also links daily light integral, or DLI, with stronger plant growth. For young plants, 8–12 mol/m²/day is often a practical starting range.
Vegetative plants usually respond well to 300–600 PPFD. Many growers maintain 14–18 hours of light, depending on species and room temperature. During flowering or fruiting, 600–900 PPFD may work when plants receive enough water, carbon dioxide, and nutrients. More light is not automatically better. The U.S. Department of Energy’s horticultural-lighting research highlights efficiency, uniformity, and heat control as major performance factors. I still check leaf posture daily, because a perfect chart cannot replace observation.
Tips: Use a light meter when possible. Increase brightness by 10–15% every few days. Watch the newest leaves for curling or pale edges. Measure DLI, not only PPFD. Keep a simple log. Plants often reveal mistakes before instruments do.
| Growth Stage | Typical Duration | Recommended Photoperiod | Target PPFD at Canopy | Approximate DLI | Suggested Starting Dimmer Level | Light Management Priorities |
|---|---|---|---|---|---|---|
| Germination and Newly Sprouted Seedlings | 1–2 weeks | 14–16 hours on 8–10 hours off |
100–200 µmol/m²/s | 5–12 mol/m²/day | 20–35% | Use gentle, uniform light to reduce stretching without overheating or drying the growing medium. Increase intensity gradually as the first true leaves develop. |
| Vegetative Growth | 2–8 weeks, depending on crop | 14–18 hours on 6–10 hours off |
250–500 µmol/m²/s | 15–32 mol/m²/day | 40–70% | Raise intensity in small steps while maintaining adequate water, nutrients, airflow, and leaf temperature. Keep the canopy evenly lit to support balanced branching. |
| Pre-Flowering or Transition | 1–3 weeks | 12–16 hours on 8–12 hours off |
400–650 µmol/m²/s | 17–37 mol/m²/day | 60–85% | Increase light only after plants have adapted to the previous level. Monitor for leaf curling, bleaching, excessive heat, or rapid moisture loss. |
| Flowering and Fruiting | 4–12+ weeks, crop dependent | 10–14 hours on 10–14 hours off |
600–900 µmol/m²/s | 22–45 mol/m²/day | 75–100% | Use the highest intensity the crop can tolerate without heat or light stress. Support higher light levels with sufficient carbon dioxide, irrigation, nutrition, and ventilation when appropriate. |
| Ripening, Finishing, or Harvest Preparation | 1–3 weeks, crop dependent | 10–14 hours on 10–14 hours off |
500–800 µmol/m²/s | 18–40 mol/m²/day | 65–95% | Maintain stable conditions rather than making abrupt changes. Reduce intensity if plants show stress or if heat and humidity become difficult to control. |
Measurement note: PPFD refers to photosynthetic photon flux density measured at the plant canopy. DLI is estimated from PPFD and photoperiod using: DLI = PPFD × hours of light × 0.0036. Actual requirements vary by plant species, cultivar, plant age, temperature, nutrition, humidity, and growing environment. Dimmer percentages are starting points only; use a PAR meter and plant response to fine-tune the setting.
: Increase brightness gradually by about 5–10% every few days. Watch the leaves. Sudden changes can bleach leaves, curl new growth, or dry the upper canopy.
Healthy leaves usually look firm, evenly green, and slightly angled toward the lamp. Keep the fixture high enough to spread light across developing flowers. Do not focus only on the tallest branches.
Not always. Stable brightness often works better than extreme intensity during fruit production. Excessive heat may cause soft fruit, flower drop, or water stress.
Measure temperature near the flowers and upper canopy. Room temperature may hide hot spots beneath the lamp. Improve airflow or reduce brightness before adding more water.
Measure PPFD at canopy height with a calibrated meter. Check several locations, including shaded areas. A poorly positioned meter can produce misleading readings.
Leafy greens often begin near 12–17 mol/m²/day. Fruiting crops often begin near 20–30 mol/m²/day. These ranges are starting points, not strict rules.
Increase intensity by 5–10%, then observe the canopy for about 48 hours. Wait for repeated symptoms before changing the dimmer again. I sometimes react too quickly after watering.
Pale new leaves, upward curling, and dry margins may signal excessive light or heat. Poor irrigation can create similar symptoms. Check moisture and temperature before blaming brightness.
Stretching, wide leaf spacing, and slow growth can suggest insufficient light. Nutrition problems may create similar signs. Do not chase numbers blindly.
Record PPFD, photoperiod, temperature, humidity, and plant responses. For example, 180 µmol/m²/s for 16 hours provides about 10.4 DLI. At 250 µmol/m²/s, the same period provides about 14.4 DLI.
Learning how to use dimmable grow lights for different growth stages helps plants receive the right amount of energy without unnecessary stress. During germination and the seedling stage, use a lower light intensity and place the fixture at an appropriate distance to protect delicate stems and leaves. As plants enter the vegetative stage, gradually increase brightness to support stronger roots, fuller foliage, and healthy structural growth. Choosing a dimmable light with adjustable intensity and suitable coverage makes it easier to match the needs of different plant varieties and growing spaces.
During flowering and fruit production, plants generally benefit from higher light levels, but intensity should still be increased gradually. Observe leaf color, posture, growth speed, and signs of heat or light stress, such as curling or bleaching. Adjust brightness, fixture height, and lighting duration when necessary. Regular monitoring allows growers to fine-tune the environment, maintain balanced development, and provide consistent support throughout the entire growth cycle.

